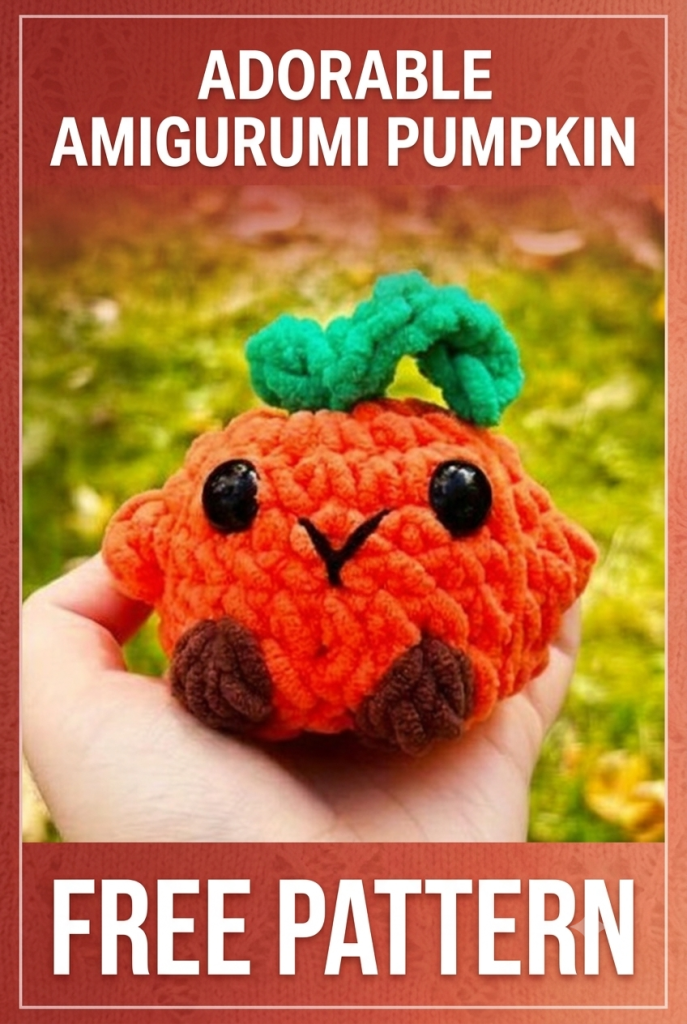
I made the first one of these on a Sunday afternoon because I had half a skein of orange velvet yarn left over and nowhere to put it. Then I made four more. They’re that kind of project.
The whole thing takes about an hour and a half if you’re not stopping to answer texts. Single crochet, a few increases, a few decreases, and some yarn wrapped around the outside at the end to make the ridges. That’s really it.
Finished size comes out around 3.5 inches tall with the stem. Small enough to sit on a windowsill, chunky enough that people pick it up without asking.
What you’ll need
Orange chenille yarn is the star here — you’ll need about 50 grams, so half a standard skein. Plus small amounts of green for the stem and vines, and brown for the paws. Honestly, scraps will do for both.
Beyond that:
- 5 mm hook (H-8)
- 12 mm black safety eyes
- Black embroidery floss for the mouth
- Polyester fiberfill, roughly 30 grams
- Tapestry needle
- A stitch marker, and I mean it
I used Bernat Velvet for mine but Sweet Snuggles works just as well and comes in better oranges, in my opinion. If all you have is worsted acrylic, that’s fine too. Drop down to a 3.5 mm hook and you’ll end up with a pumpkin closer to 2.5 inches, which is arguably cuter anyway.
A quick word about chenille yarn
If you’ve never worked with velvet yarn before, two things will surprise you.
The first is that it’s incredibly forgiving. The pile swallows your stitches, so tension that would look sloppy in cotton just disappears. Great news for anyone who tightens up when they’re concentrating.
The second is that you cannot see what you’re doing. At all. Stitch definition is basically zero, which is why the stitch marker isn’t optional. I’ve frogged an entire pumpkin body because I lost my place on round 7 and didn’t notice until round 12.
There’s also worming, where the yarn untwists and pops loops up on the surface. Going down a hook size sorts out most of it, and that’s why this pattern uses a 5 mm on a yarn that usually says 6.5 on the label.
Abbreviations
US terms throughout. Worked in continuous rounds, so don’t join or chain up at the end of a round.
- MR — magic ring
- sc — single crochet
- inc — 2 sc in the same stitch
- dec — decrease (invisible decrease if you know it)
- st / sts — stitch, stitches
- ( ) x6 — repeat what’s in the brackets six times
Numbers in bold at the end of each round are your stitch count.
The pumpkin body
Orange yarn, 5 mm hook.
Rnd 1: 6 sc in MR (6) Rnd 2: inc x6 (12) Rnd 3: (sc, inc) x6 (18) Rnd 4: (2 sc, inc) x6 (24) Rnd 5: (3 sc, inc) x6 (30) Rnds 6–11: sc around (30) Rnd 12: (3 sc, dec) x6 (24) Rnd 13: (2 sc, dec) x6 (18)
Stop here. This is where the face goes on, and it’s much easier while the opening is still wide.
Put the safety eyes in between rounds 8 and 9, about 6 stitches apart. You’ll need to push the fuzz aside with your fingernail to find the real hole — with chenille, the gap you can see is almost never the gap that’s actually there. Push the washers on firmly from the inside.
For the mouth, use black floss and make a simple V shape, centred between the eyes and about two rounds down. Two straight stitches meeting at a point. Resist the urge to make it bigger than you think it should be; small reads friendlier.
Rnd 14: (sc, dec) x6 (12)
Stuff it now. Firmly. Firmer than that. A soft pumpkin looks fine in your hands and terrible in photos, and this is the round where you still have room to work.
Rnd 15: dec x6 (6)
Fasten off with a long tail. Thread it through the front loops of the last 6 stitches and pull the hole closed, but don’t snip the tail — you need it for the ridges.
Stem
Green yarn.
Rnd 1: 6 sc in MR (6) Rnds 2–4: sc around (6)
Fasten off, long tail for sewing. No stuffing. Chenille is bulky enough on its own that a stuffed stem just looks bloated.
Vines (make 2)
Chain 12. Then sc in the second chain from the hook and in every chain back down.
Fasten off with a tail. It’ll curl up on its own as you work, which is the whole point, so don’t try to straighten it out.
Leaves (make 1 or 2)
Chain 7. Starting in the second chain from the hook: sc, hdc, dc, dc, hdc, sc.
Fasten off, leave a tail. One leaf looks a bit sparse to me and three looks like a salad, so I usually go with two.
Paws (make 2)
Brown yarn.
Rnd 1: 6 sc in MR (6) Rnd 2: (sc, inc) x3 (9) Rnds 3–4: sc around (9)
Fasten off with a long tail and squash each one flat between your fingers. Don’t stuff these.
Putting it together
The ridges are the part that makes it look like a pumpkin rather than an orange ball, so take your time here.
Thread that long body tail onto your tapestry needle. Go in at the centre bottom and come out at the centre top. Then bring the yarn down the outside of the pumpkin, back in at the centre bottom, and pull. You’ve made one ridge. Do that six times, spacing them evenly around.
Pull each wrap snug but not brutal. There’s a point where a nicely segmented pumpkin turns into a donut and you can’t undo it without redoing all six.
After that:
Sew the stem to the centre top. It’ll cover the messy spot where all your wraps meet, which is convenient. Then sew the vines and leaves around the base of the stem so they spill outward. Last, the paws go on the lower front, about 4 stitches apart, flat side against the body.
Weave your remaining ends deep into the stuffing rather than along the surface. With velvet yarn they vanish completely.
When things go sideways
The yarn keeps splitting. Your hook is probably too pointy. Something with a rounder head — Clover Amour, Susan Bates — slides through instead of catching.
You’ve lost count and it’s lopsided. Move the stitch marker every single round, no exceptions. And if you come up one stitch short somewhere, just add an extra in the next round. At this size nobody is going to know, including you, in about ten minutes.
An eye won’t stay put. The pile stops the washer sitting flat. Squeeze it on with pliers, and add a dab of fabric glue to the shank if it still wobbles.
Questions people ask
How long does it take? Somewhere between an hour and two, assembly included. The body’s about 45 minutes of that.
Can I make a bigger one? Add another increase round — (4 sc, inc) x6 for 36 — then two extra straight rounds, and mirror that extra decrease on the way back down. Gets you to roughly 5 inches.
Is it safe for a baby? Not with plastic eyes. Embroider them with black yarn instead and skip the safety eyes completely. Check your ends are properly buried too.
Can I sell them? Yes, sell the finished pumpkins all you like. A link back to this post is appreciated but not required. Please don’t copy or repost the written pattern itself.
If a round doesn’t behave, leave a comment with the round number and I’ll help you work out where it went wrong. And if you make one, I’d love to see it — I share my favourites on Fridays.
Leave a Reply